How Can We Help?
Primary Customers: How to Create and Locate in Actum Portal
For merchants frequently transacting with a select group of clients or a dedicated client for their business, Primary Customers identifies these individuals and/or businesses with transaction management. This article reviews how to designate and locate Primary Customer in the Actum Portal.
Designating a Primary Customer
1. Log in to the Actum Portal by going to https://merchant.actumprocessing.com. Refer to the Multi-Factor Authentication (MFA): How to Use via Actum Portal article for further login instructions.
2. On the left side menu, select Features and Procedures and choose Create Transaction.![]()
3. Click on the New Primary Customer radio box.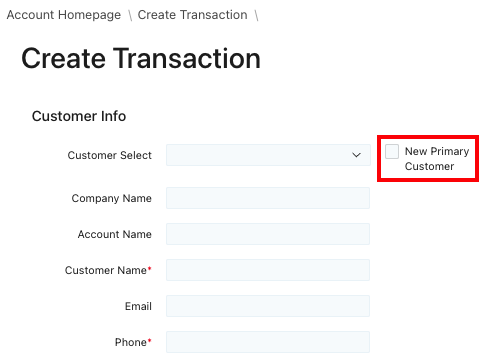
4. Reference the How to Submit a Transaction Through the Actum Portal article on how to submit a transaction in the Actum Portal.
Locating a Primary Customer
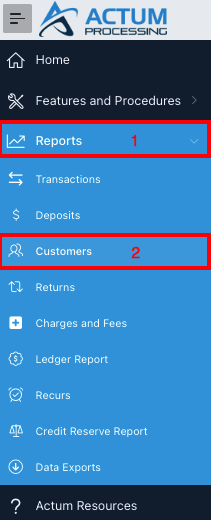
1. After logging in to the Actum Portal at https://merchant.actumprocessing.com, select Reports and choose Customers.
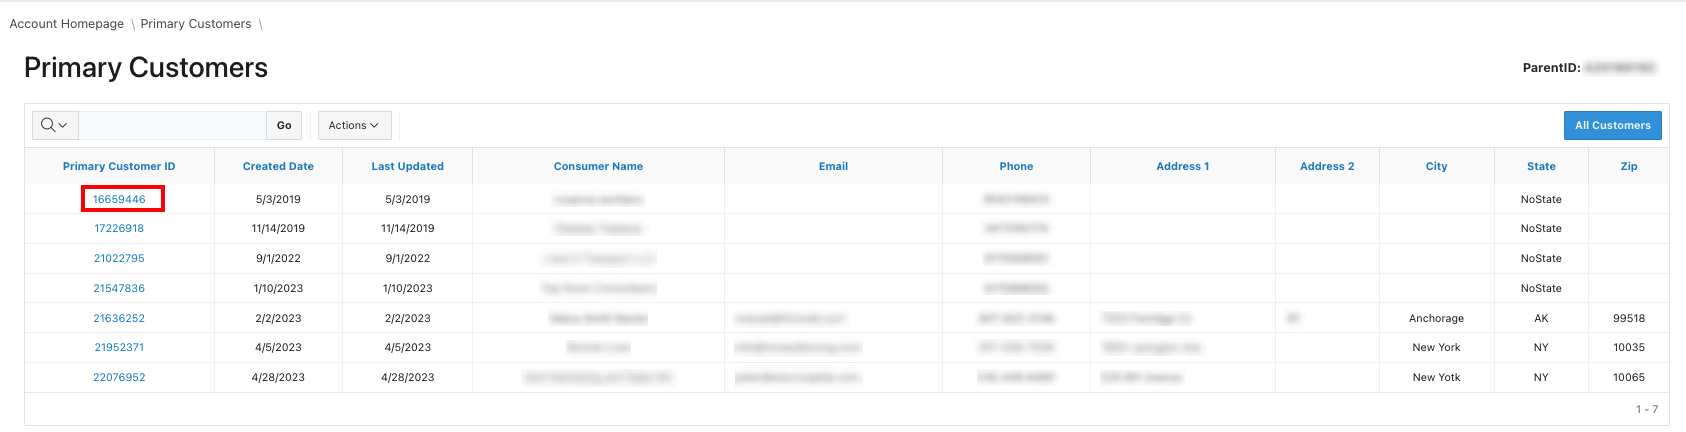
2. Once the Primary Customers page populates, click on a Primary Customer ID number to view more information about a Primary Customer.
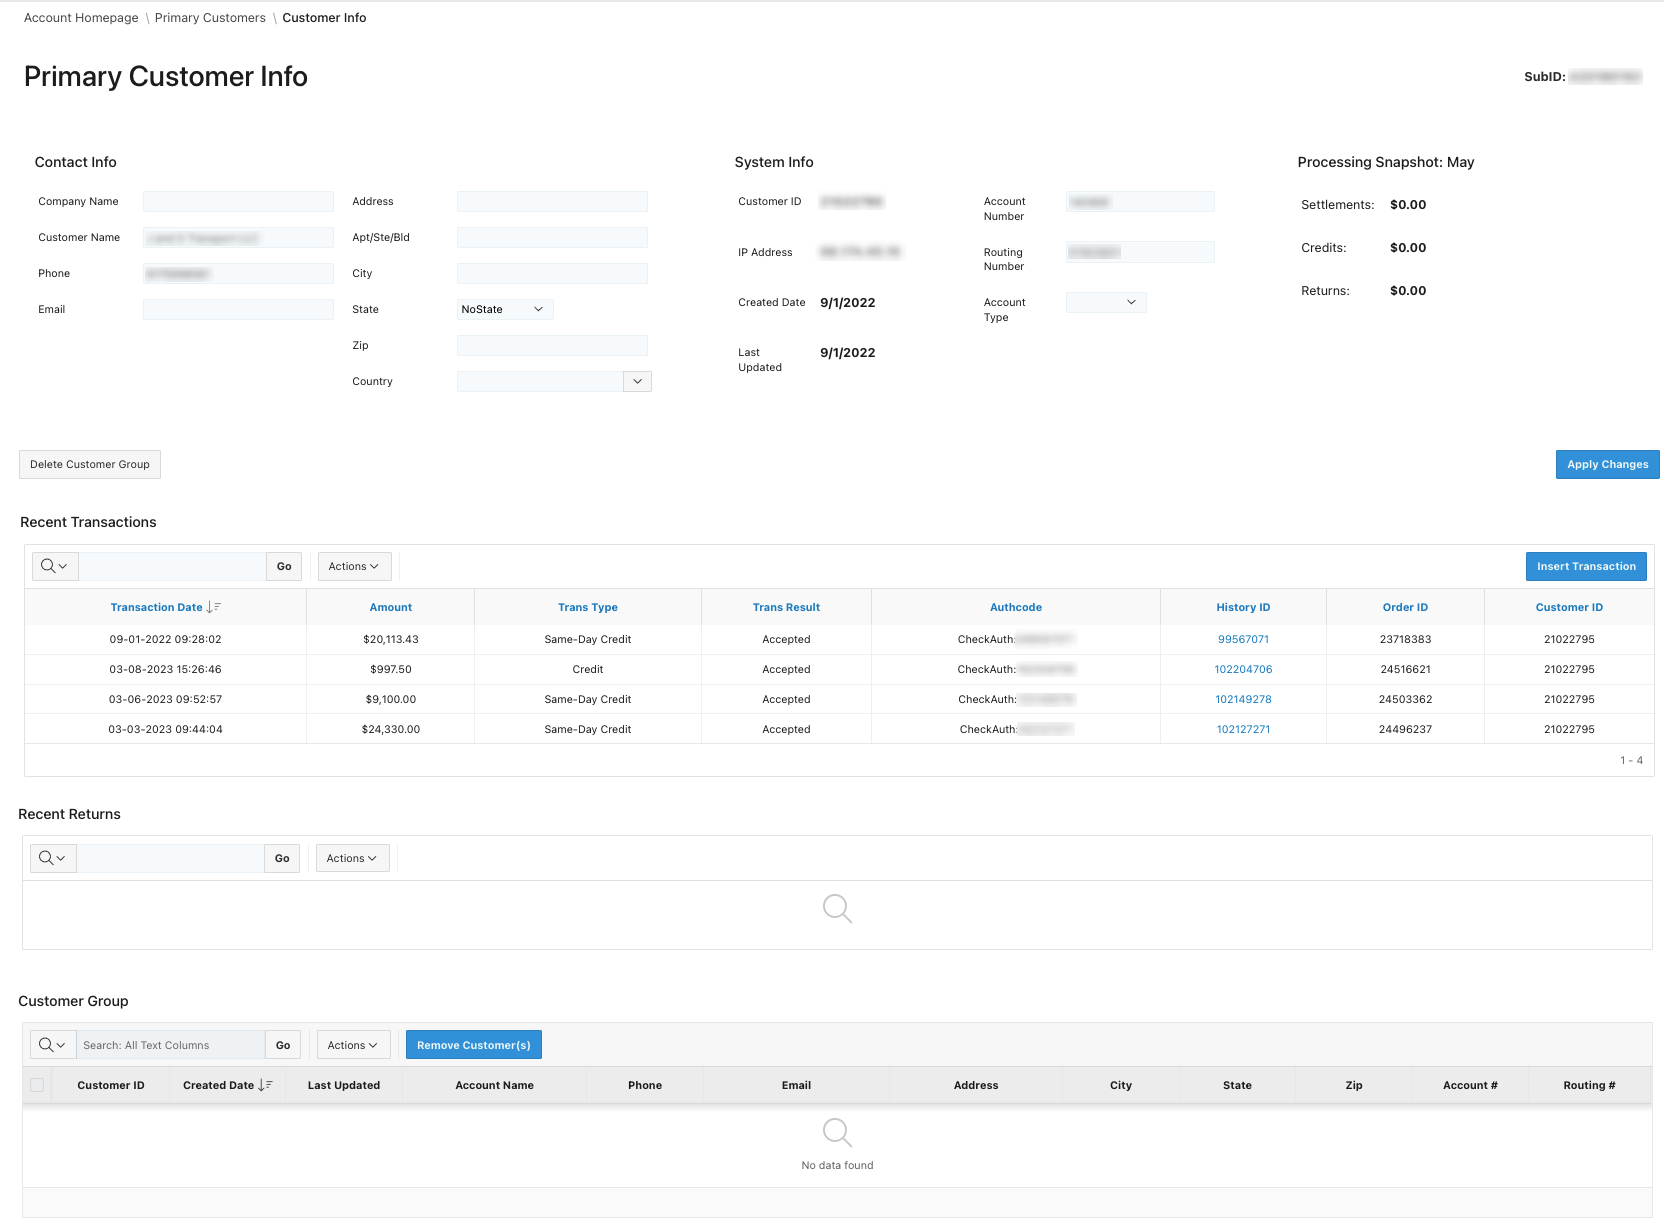
3. Information about a Primary Customer populates with data about the most Recent Transactions and Returns and a Customer Group, if applicable.
Creating New Primary Customer from Existing Client
1. After logging in to the Actum Portal at https://merchant.actumprocessing.com, select Reports and choose Customers.
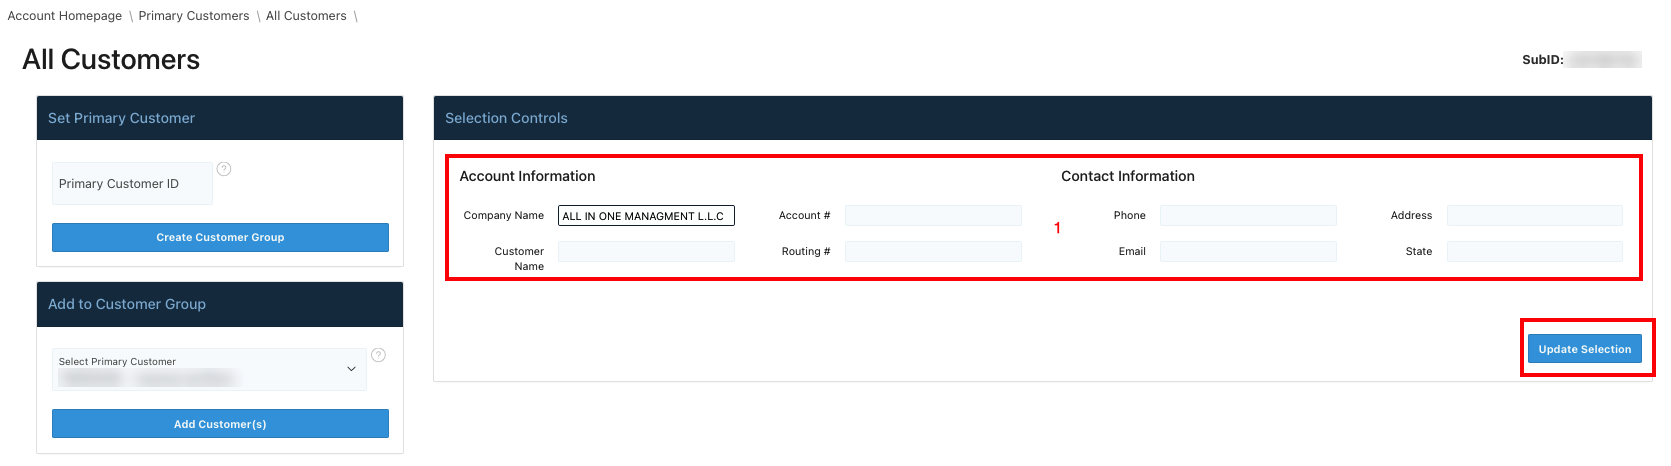
2. Click on the All Customers button.

3. In the Selection Controls section of the All Customers page, enter the Company or Customer Name, the Bank Account #, the Routing #, Phone Number, Address, Email and State. Click on Update Selection.
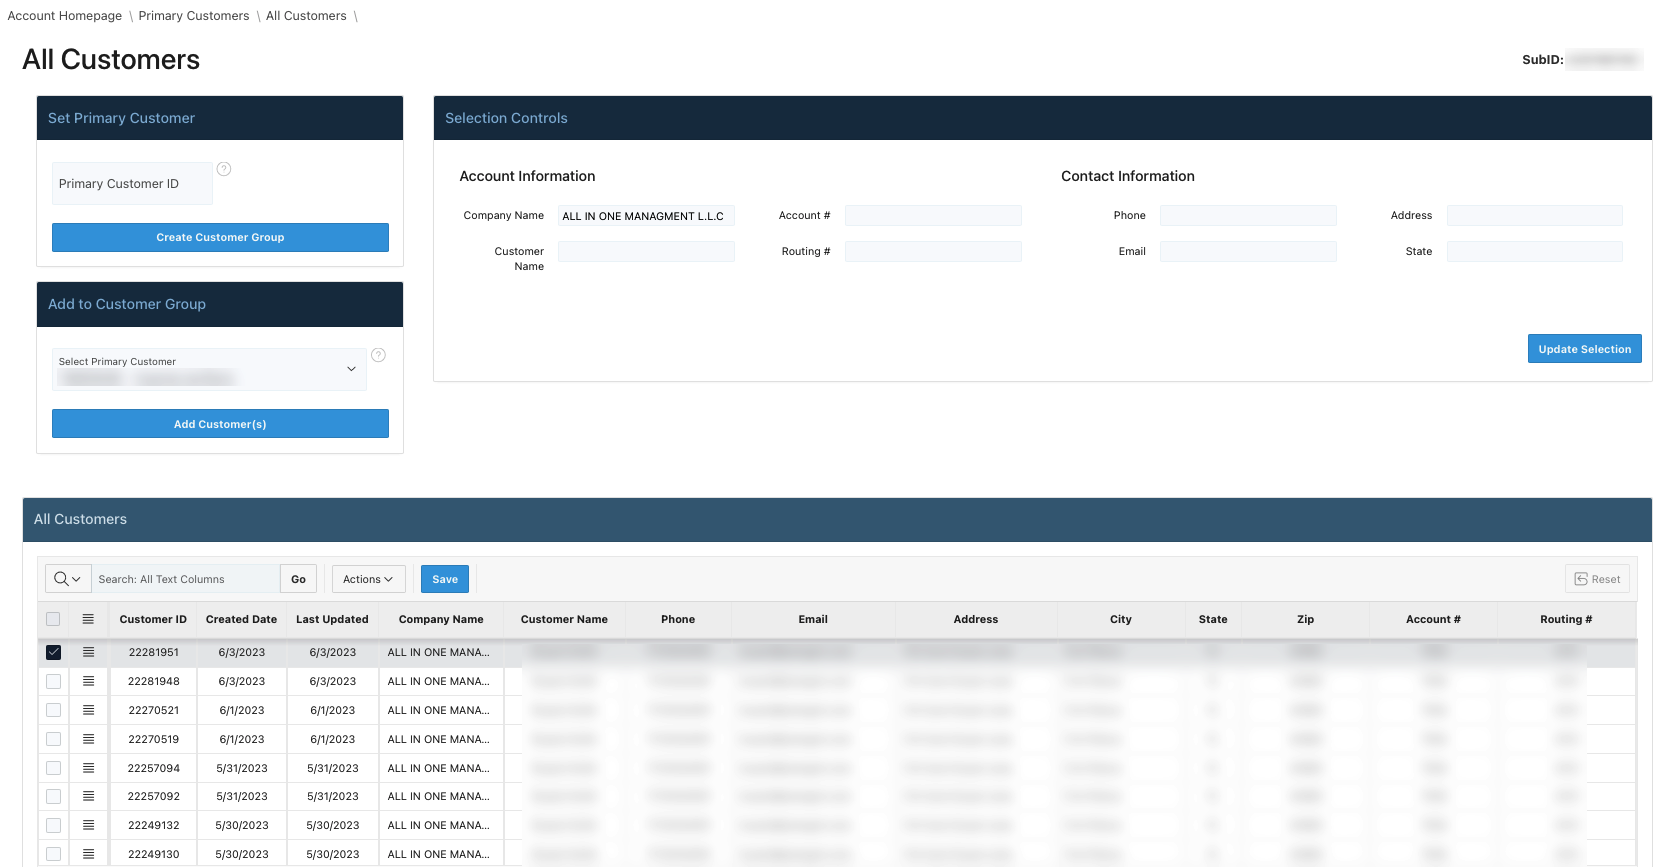
4. The All Customers page populates all records associated with the specified customer.
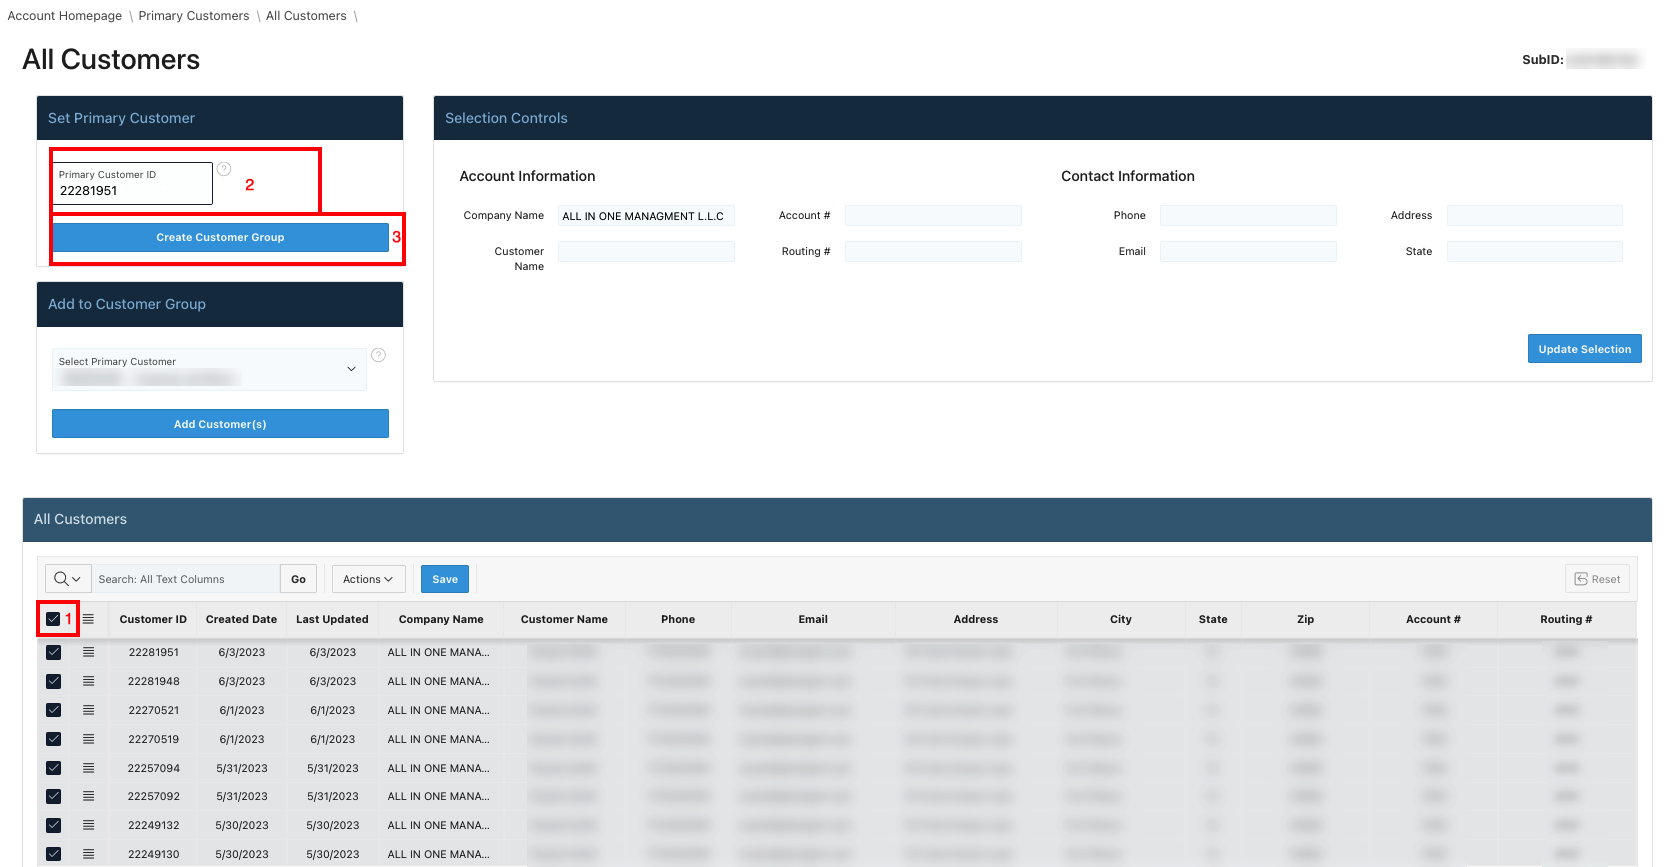
5. After verifying and confirming that the customer records are the same customer or business in question, click on the top left checkbox to select all of the records in the All Customers section, enter the most recent Primary Customer ID in the Set Primary Customer section and click on Create enter the Primary Customer ID number and click on Create Customer Group. The most recent Customer ID can be found in the All Customers section of the All Customers page.
Additional Resource
For further information, please review our interactive Scribe entry.